Picturing Git
It took me a few years of using Git before I started to understand what I was doing. In the hopes that I can shorten that time for you, I share here a description of the mental model that I’ve developed of how it works in the classes that I teach.
One-time Setup
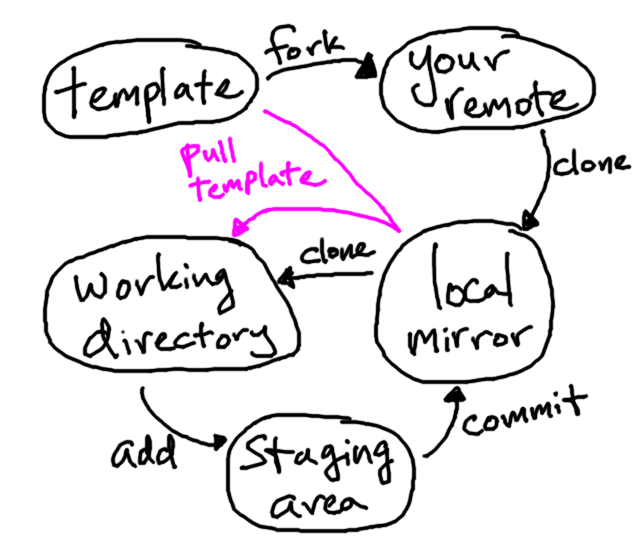
Before the semester even starts, I set up a template repository that contains things like homework specifications and graders. This repository is publicly available on Bitbucket or GitHub, but only I can write to it. Let’s draw it:

At the beginning of the semester, you make your own copy of the template by forking my repository. This fork also lives remotely on Bitbucket or GitHub:

To get your remote repository on your local machine, you clone it:
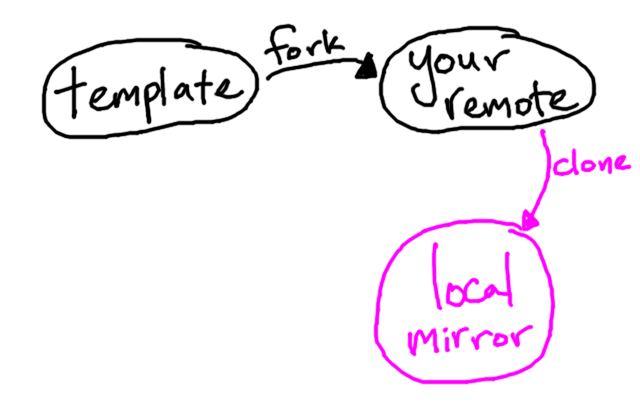
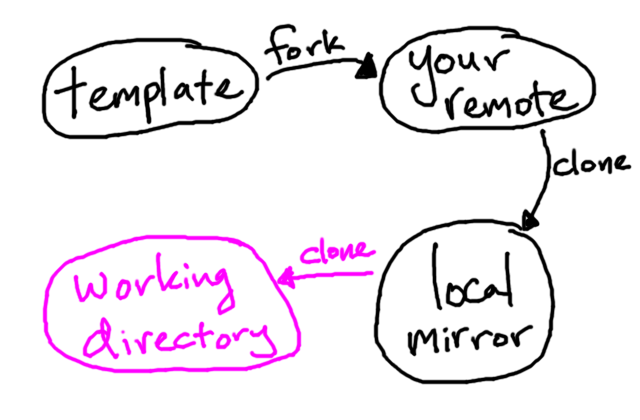
The local mirror is not what you edit—it’s a database containing snapshots of our files throughout history. When you cloned your remote repository, the most recent snapshots were also automatically extracted into a working directory, whose files you can edit:
These steps usually only need to be completed once during the semester. If your repository breaks, the fastest path to recovery may be to fork and clone again, migrating over any files from the working directory with the broken repository.
Pushing Changes
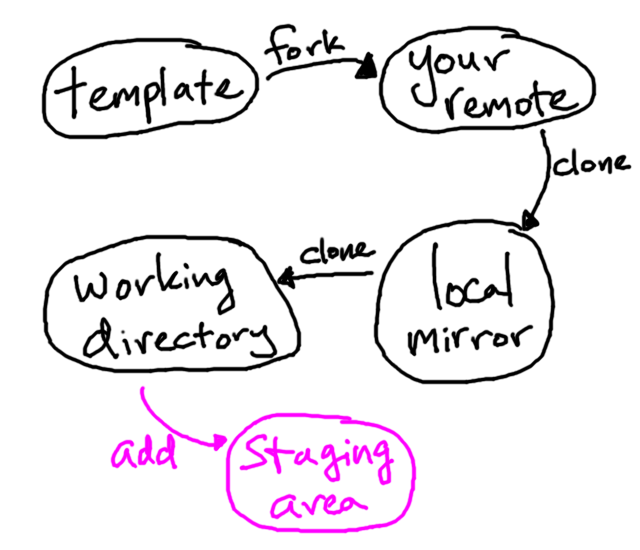
You get the itch to work on a homework assignment. You don’t finish it all, but you make some progress. You still have two weeks left to finish the rest, but you want to make sure your progress is vouchsafed with your remote repository. Sadly, any changes you made (including edits to existing files, new files, and file deletions) only exist in the working directory. To inform Git of these changes, you first wrangle them into the staging area or index:
After you’ve staged a related set of changes, you ship them off to the local mirror through a commit. Each commit should be explained with a short message explaining what changes you made:
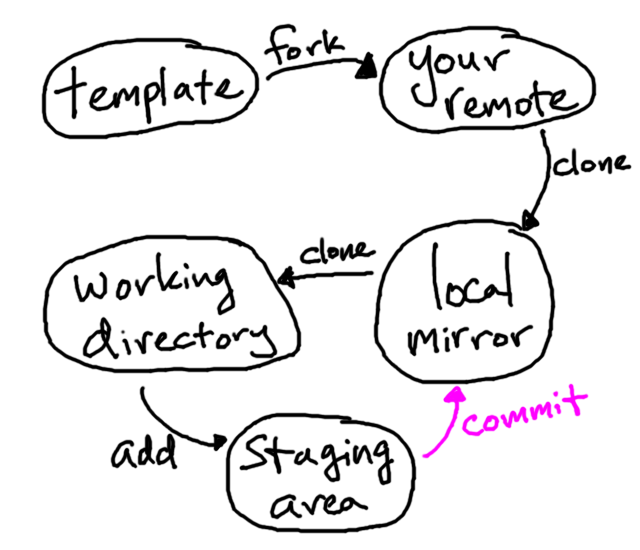
Your commit has made it to the local mirror. If your machine falls into the river, so does your local mirror. To get your commits up to your remote repository, you must push them:
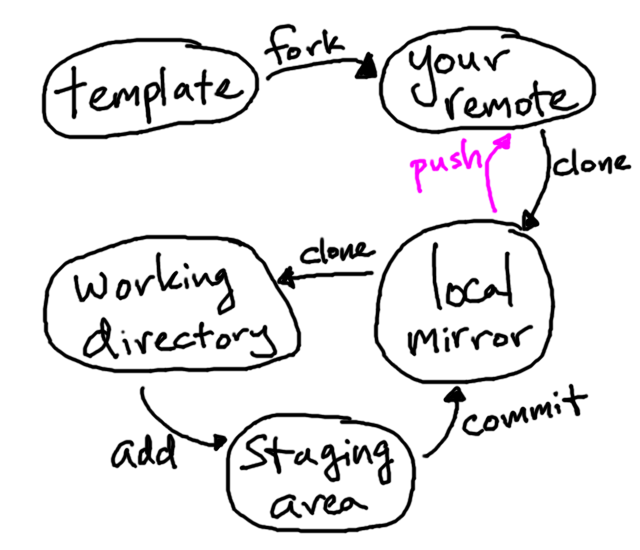
At this point, your files are safe on the remote repository. Your instructor can see them, assuming the permissions were set appropriately when you forked the template. You should verify the push succeeded by viewing your repository in the web browser.
Pulling Origin
Cloning your repository on multiple machines is perfectly legal. Suppose on machine A you commited and pushed some changes to your remote repository. To get these on machine B, you could fetch them:
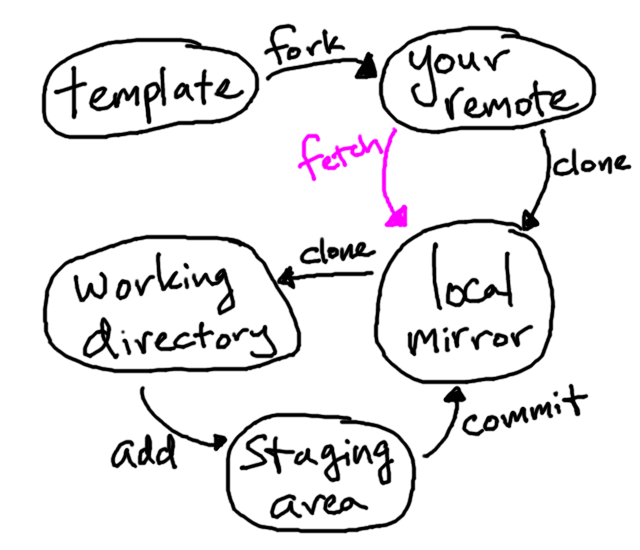
But this only brings the changes down to the local mirror. To integrate them into the working directory, you must also merge them:
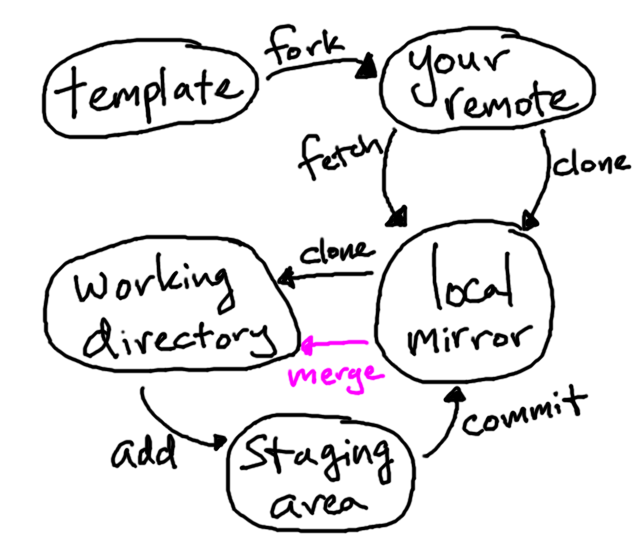
However, the pull command makes this easier. It executes both a fetch and a merge in one fell swoop:
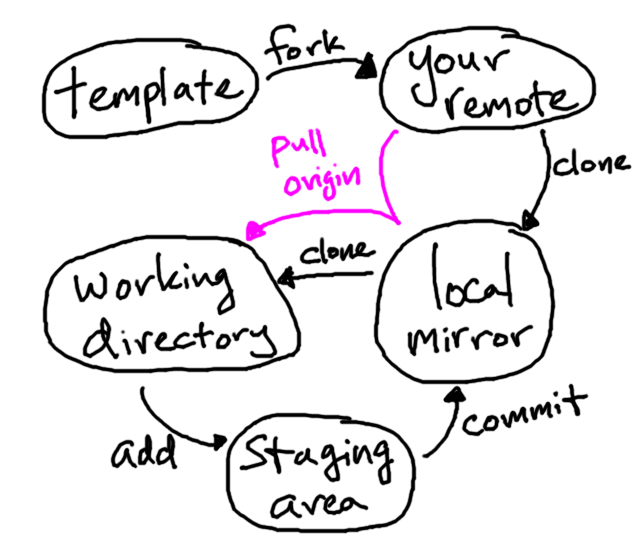
If there are edits in both your working directory and edits in your remote repository, Git will figure out if it can combine them. If the edits conflict with each other, the merge step will fail. It’s best to avoid these conflicts by always pushing up your changes at the end of a work session and pulling any new ones down at the beginning of a session.
Pulling Template
By default, a pull draws from origin, which is your remote repository. Sometimes your instructor issues changes to the template repository, the one you had originally forked. To synchronize your repository with the template, you pull down changes from the template remote, which you added explicitly:
Your remote repository is side-stepped here. You’ll need to explicitly push to your remote repository the commits you pulled down.